tháng 9 2014

ADS alt và title image am-sieu-toc Bài Đăng Mẫu Bài Viết bep-hong-ngoai bep-tu Blogger Template Blogger Templates Blogspot Blogspot cơ bản Breadcrumb cay-nuoc-nong-lanh Chảo ceramic Chảo đáy từ Chảo thường chia sẻ templates Chuyên nghiệp Chữ đổi màu CNTT Code Đếm Blogspot Code Spam Comments Contact Form Coupon Công cụ web CSS Data den-suoi-nha-tam description Design Domain đồ gia dụng Ebook Ebook-SEO Facebook Giải Trí Giao diện bán hàng Giao Diện Blogspot Giao diện có phí Giao Diện Mobi Giao diện tin tức Google Adsense Hàng gia dụng HTML & CSS Hướng dẫn IFTTT Javascript jQuery Kéo Kho templates Kiếm tiền online Kiến thức Label Lập trình blogspot Lập Trình Web lo-nuong lo-vi-song Máy sấy quần áo may-hut-bui Mẹo vặt miễn phí Món ngon mô tả New Member Nghe Nhạc nhật kí template noi-ap-suat-dien Nồi p Photoshop PHP Popular Posts quat-suoi recent post Responsive SEO Bài Viết SEO Blogspot SEO On Page SEO Settings SEO-Blogspot Share Slide Slider Ảnh tabber Tap chi thiet ke web Tặng Template Bán Hàng Template Chuẩn SEO Template có phí tuyệt vời Template Free Template Responsive Template Tin Tức Template Video Template-Vip Templates In Ấn Thiet ke bammer Thiết Kế Template Thiết kế web Thủ Thuật Blogger (Blogspot) Thủ thuật blogspot Thủ thuật Facebook Thủ thuật máy tính Thủ thuật seo Thủ Thuật Youtube thumbnail Tin mới nhất - VnExpress RSS Tin tức Tivi Tooltip Tổng Bài Đăng. Tổng Hợp tu-dong tu-mat tu-say-quan-ao Vào bếp Video Hót Web Design Widget Wordpress-Series Xem Phim XML Xóa JS Mặc Định Blogspot Youtube


FZ1000 at E400mm focal length hand held
 
Quirky:  Having or characterised by peculiar or unexpected traits or aspects.
Algorithm:  A procedure or formula for solving a recurrent problem.
With reference to the operation of a camera, the "Recurrent Problem" to be solved in Programme Auto Exposure Mode [P] is the "Firing Solution", which is the correct exposure expressed as ISO setting, Aperture and Shutter Speed. In [P] Mode the camera has to figure out a value for all three exposure parameters, assuming Auto ISO is set and make allowance for the focal length of the lens.

[P] Mode  on the FZ1000 selects an unexpected aperture and shutter speed in certain conditions.  
[iA] and [iA+]  modes appear to use the same algorithms for Aperture, Shutter Speed and Auto ISO.

In bright light  As subject brightness increases, the FZ1000 holds onto the widest aperture available at any focal length until the shutter speed reaches about 1/2000sec. Only then does the aperture start to decrease (the f number starts to increase).
So for instance in bright light the camera will select 1/2000sec @f2.8, with the focal length at E25mm.
Most cameras which I have used close down the aperture as  well as increasing shutter speed as light levels increase. This usually brings the lens to an optimal aperture for resolution and allows for increased depth of field.
This would produce say, 1/500sec @ f5.6 giving the same exposure but a more workable aperture and an easily fast  enough shutter speed.
The remedy for this  is to
* Keep a close eye on the readouts for aperture and shutter speed in the viewfinder,
* Apply Programme Shift with the Rear Dial to bring up the f number to a more workable level.

However  [iA] and [iA+] users are out of luck as Programme Shift is not available in these Modes.

In moderate light  The camera makes decisions about the firing solution which appear to be in line with other cameras which I have used.  The shutter speed increases as the lens is zoomed out and the ISO setting progressively moves up to 1600.  There are no surprises here,  however the camera selects a shutter speed of 1/60 sec at wide angle when 1/30 sec would probably suffice given the very good 5 axis OIS.

In low and very low light  As subject brightness decreases the camera holds on to ISO1600  until shutter speed drops to 1/6 second at any focal length. Only then does the ISO setting start to increase  Obviously the camera doesn't want to use an ISO setting greater than 1600. But holding  ISO 1600 can result in a very slow shutter speed and unsharpness due to camera shake.

This can be managedof course by using the flash, putting the camera on a tripod  or selecting a higher ISO setting.   
I find it desirable to keep a close eye on the shutter speed readout in the viewfinder and be aware of the "one over E Focal length" rule for handheld shutter speeds.  So if the [Full frame effective] focal length, marked on the lens barrel and appearing in the viewfinder whenever the lens is zoomed,  is, say 100mm, then the slowest shutter speed for hand held photos is about 1/100sec for a person with steady hands.
With OIS ON a slower shutter speed may be possible but OIS does nothing to control subject movement.

Summary  For best results I find it very useful to closely monitor the aperture, shutter speed and ISO readouts in the viewfinder or monitor and to apply correction as required for best results. Simply leaving the camera to select a firing solution in [P] Mode will sometimes give a suboptimal result, in the form of insufficient depth of field  in bright light or camera shake blur due to slow shutter speed in low light levels.

For this reason I do not use [P] Mode with the FZ100. I use [A] or [S] Mode most of the time.

Panasonic could make an adjustment to the exposure algorithms via a firmware update to bring the FZ1000 firing solution in [P] Mode more in line with other cameras.


Giới thiệu 1 chút về Recent Postswidget cập nhật thông tin bài viết mới nhất của blog hoặc theo một nhãn (label) của blogger. Recent Posts dễ dàng tùy biến và không làm ảnh hưởng lớn tới tốc độ load của Website. Widget này thích hợp để làm site Tin tức và phù hợp với những bạn làm website thủ thuật
Và sau đây mình xin hướng dẫn các bạn  Tạo Recent Posts với style tin tức đẹp cho Blogger

Tạo Recent Posts với style tin tức đẹp cho Blogger

Để tạo widget Recent Posts, các ban thực hiện các bước sau:

Bước 1: Các bạn vào Bố cục→Thêm tiệc ích HTML→Thêm đoạn code sau:
<style type="text/css">
#rc-plus {width:260px;margin:0;padding:10px;overflow:hidden;border:1px solid #ccc;background:#fff}
.rc-plus h2{background:#39c;color:#fff;line-height:1.6em;margin:0 0 10px;padding:4px 10px;font-weight:bold}
.rc-plus ul{list-style:none;margin:0;padding:0}
.rc-plus li{text-indent:0;background:url(https://blogger.googleusercontent.com/img/b/R29vZ2xl/AVvXsEhReoO1iEW2-7pVeh8uY39y7ZD9aaBzjMvflsBw-rB1g8Li6qU3tsYI3muxtUATKKqlAwLRjt6reBkefTZpfYu1ASxea6y9AKPXw8zkgsAeTo00SXVBs8eciTgQUNqtCq0xrFMUhEe1MUL9/) no-repeat 0 7px;line-height:1.5em;margin:0;padding:2px 0 2px 15px}
.rc-plus h2 a:link, .rc-plus h2 a:visited {color:#fff}
</style>
<div id="rc-plus" class="rc-plus">
<h2><a href="http://www.ichiase.biz/search/label/Thủ%20Thuật%20Blogger">Thủ thuật Blogger</a></h2>
<script type='text/javascript'>
numposts = 5; list1 = 1; sumPosts = 168;
</script>
<script type='text/javascript'>
//<![CDATA[
function removeHtmlTag(a, b) {
    var s = a.split("<");
    for (var i = 0; i < s.length; i++) {
        if (s[i].indexOf(">") != -1) {
            s[i] = s[i].substring(s[i].indexOf(">") + 1, s[i].length)
        }
    }
    s = s.join("");
    s = s.substring(0, b - 1);
    return s
}
function showrecentposts(e) {
    img = new Array();
    for (var i = 0; i < numposts; i++) {
        var f = e.feed.entry[i];
        var g = f.title.$t;
        var h;
        if (i == e.feed.entry.length) break;
        for (var k = 0; k < f.link.length; k++) {
            if (f.link[k].rel == 'alternate') {
                h = f.link[k].href;
                break
            }
        }
        if ("content" in f) {
            var j = f.content.$t
        } else if ("summary" in f) {
            var j = f.summary.$t
        } else
        var j = "";
        s = j;
        a = s.indexOf("<img");
        b = s.indexOf("src=\"", a);
        c = s.indexOf("\"", b + 5);
        d = s.substr(b + 5, c - b - 5);
        if ((a != -1) && (b != -1) && (c != -1) && (d != "")) img[i] = d;
        var l = '<table border="0" cellpadding="0" cellspacing="0" style="margin-bottom:5px;border-bottom:double #eee"><tr><td><img width="110" height="85" src="' + img[i] + '" align="left" border="0" title="' + g + '" alt="' + g + '" style="margin:5px 10px 0 0"><a href="' + h + '"><b>' + g + '</b></a><p style="margin:0;padding:5px 0 10px">' + removeHtmlTag(j, sumPosts) + ' ...</p></td></tr></table>';
        var m = '<li><a href="' + h + '">' + g + '</a></li>';
        if ((i >= 0) && (i < list1)) {
            var n = l
        }
        if (i == list1) {
            var n = '<div class="rc-plus"><ul>' + m
        }
        if ((i > list1) && (i < numposts - 1)) {
            var n = m
        }
        if (i == numposts - 1) {
            var n = m + '</ul></div>'
        }
        document.write(n)
    }
}
document.write("<script src=\"http://www.ichiase.biz/feeds/posts/default/-/Phần mềm?max-results="+numposts+"&orderby=published&alt=json-in-script&callback=showrecentposts\"><\/script>");
//]]>
</script>
</div>
Lưu ý: Các bạn thay http://www.ichiase.biz thành địa chỉ blog của bạn.
-Thủ Thuật Blogger">Thủ thuật Blogger</a></h2> là tiêu đề của widget.
-Phần mềm là Nhãn(label) hiển thị của wiget.

-Nếu bạn muốn widget hiển thị bài viết của tất cả các nhãn của Blog. Các bạn thay đoạn code 
document.write("<script src=\"http://www.ichiase.biz/feeds/posts/default/-/Phần mềm?max-results="+numposts+"&orderby=published&alt=json-in-script&callback=showrecentposts\"><\/script>");
thành đoạn code
document.write("<script src=\"http://www.ichiase.biz/feeds/posts/default/?max-results="+numposts+"&orderby=published&alt=json-in-script&callback=showrecentposts\"><\/script>");
-Trong đoạn code trên
numposts = 5: số bài viết hiển thị;
list1 = 1: số lượng bài viết có hình ảnh avatar;
sumPosts = 168: số kí tự của mô tả;
Nguồn : VănViet Blog's

Menu ngang với hiệu ứng CSS3
ảnh minh họa

Ở bài trước mình đã hướng dẫn Tạo Menu với hiệu ứng hình ảnh đẹp mắt Blogger/Website  Và để tiếp tục hôm nay mình xẽ hướng dẫn các bạn tạo Menu ngang với hiệu ứng CSS3 . Demo các bạn xem ngay bên dưới nhé
Và đây là cách để thêm menu này :
Bước 1 : Thêm đoạn css sau và trước </head>

<style>
html { height: 100%; background: black; }
ul {
  overflow: hidden;
  position: relative;
  list-style: none;
  padding: 0;
  margin: 0 auto;
  min-width: 800px; max-width: 1600px;
  background: rgba(white, .2);
  font-size: 0;
  text-align: center;
}
li {
  display: inline-block;
  position: relative;
  width: 12.5%; height: 100%;
  font: 1rem/3 trebuchet ms, verdana, century gothic, arial, sans-serif;
  text-transform: uppercase;
  cursor: pointer;

  @for $i from 0 to 8 {
    &:nth-child(#{$i + 1}) {
      $c: hsl($i*360/8, 100%, 70%);
      color: $c;
   
      &:hover {
        color: black;
     
        & ~ li:last-child {
          transform: translate($i*100%);
          background: lighten($c, 5%);
          transition: .7s cubic-bezier(.175, .885, .32, 1.275);
        }
      }
    }
  }

  &:last-child {
    position: absolute;
    z-index: -1;
    left: 0%;
    transform: translate(350%);
    background: rgba(white, 0);
    transition: background .35s ease-out, transform 0s .35s;
  }
}
</style>
Bước 2 : Tiếp theo các bạn chèn code bên dưới vào nơi cần hiển thị Menu ngang với hiệu ứng CSS3
<ul>
  <li>news</li>
  <li>products</li>
  <li>services</li>
  <li>gallery</li>
  <li>about us</li>
  <li>contact</li>
  <li>jobs</li>
  <li>blog</li>
  <li></li>
</ul>


Nguồn : iChiaSe.Biz

Tạo Menu với hiệu ứng hình ảnh đẹp mắt Blogger/Website

Để Thêm  Menu với hiệu ứng hình ảnh đẹp mắt Blogger/Website
1. Đăng nhập vào tài khoản Blogger
2. Vào phần Mẫu (Template)
3. Chọn chỉnh sửa HTML (Edit HTML)
4. Chèn code bên dưới vào nơi cần hiển thị menu:

<style>
#fbt-nav {margin:0 auto;list-style: none;width: 965px;height: 86px;overflow-y: hidden;}
#fbt-nav li {float: left;}
#fbt-nav li a {display: block;color: white;width: 120px;height: 61px;margin-top: 24px;text-decoration: none;text-align: center;}
#fbt-nav li a span.aname {font: bold 17px/61px "Arial";color: #fff;text-transform: uppercase;cursor: pointer;position: relative;top: 0;transition: top .5s ease;text-shadow: 1px 1px 1px rgba(0, 0, 0, 0.5);}
#fbt-nav li a img {position: relative;top: 0;transition: top .5s ease;}
#fbt-nav li a:hover {cursor: pointer;}
#fbt-nav li a:hover img {top: -85px;}
#fbt-nav li a:hover .aname {top: 85px;}
#fbt-nav li:nth-child(1) a {background: #150517;border-radius: 5px 0 0 5px;}
#fbt-nav li:nth-child(2) a {background: #3E3535;}
#fbt-nav li:nth-child(3) a {background: #4A4344;}
#fbt-nav li:nth-child(4) a {background: #595454;}
#fbt-nav li:nth-child(5) a {background: #616D7E;}
#fbt-nav li:nth-child(6) a {background: #5E5A80;}
#fbt-nav li:nth-child(7) a {background: #2B60DE;}
#fbt-nav li:nth-child(8) a {background: #38ACEC;border-radius: 0 5px 5px 0;}
</style>

<div id="fbt-nav">
<li> <a href="/"><span class="aname">Homepage</span> <img src="http://icons.iconarchive.com/icons/oxygen-icons.org/oxygen/48/Places-user-home-icon.png" /> </a> </li>

<li> <a href="#"> <span class="aname">Archive</span> <img src="http://icons.iconarchive.com/icons/kearone/comicons/48/zip-software-icon.png" /> </a> </li>

<li> <a href="#"> <span class="aname">About me</span> <img src="http://icons.iconarchive.com/icons/aha-soft/standard-portfolio/48/About-icon.png" /> </a> </li>

<li> <a href="#"> <span class="aname">Our Blog</span> <img src="http://icons.iconarchive.com/icons/scoyo/badge/48/My-Blog-icon.png" /> </a> </li>

<li> <a href="#"><span class="aname">Science</span> <img src="http://icons.iconarchive.com/icons/iconshock/real-vista-education/48/technology-icon.png" /> </a> </li>

<li> <a href="#"><span class="aname"> Sports  </span> <img src="http://icons.iconarchive.com/icons/itzikgur/my-seven/48/Games-Soccer-icon.png" /> </a> </li>

<li> <a href="#"><span class="aname">Photos</span> <img src="http://icons.iconarchive.com/icons/apathae/satellite/48/2-Pictures-icon.png" /> </a> </li>

<li> <a href="#"> <span class="aname">Contact</span> <img src="http://icons.iconarchive.com/icons/deleket/soft-scraps/48/Email-Download-icon.png" /> </a> </li>
</div>
Đối với website cũng tương tự các bạn chỉ cần đặt code trên vào nơi cần hiển thị

Demo đây Menu với hiệu ứng hình ảnh đẹp mắt Blogger/Website Anh Em nhé:


Chúc các bạn thành công
Nguồn : iChiaSe.Biz

Ở hầu hết các Website hiện nay thì chúng ta thường bắt gặp những slider trình diễn ảnh , Nó khiến chúng ta cảm thấy website thêm phần đẹp hơn, nó có thể làm nổi bật những phần nội dung chính trong Website. Và Câu hỏi đặt ra là : Slider để làm gì? Slider có tốt không? 
Mình xin trả lời như sau : Slide ảnh giúp blog của bạn trông đẹp hơn và PRO hơn, Còn 1 điều nữa mình cũng muốn nói với các bạn là khi bạn có 1 website đẹp và bố cục rõ ràng thì tất nhiên khi khách vào xem họ xẽ cảm thấy rễ ràng hơn, và cản thấy thích thú hơn. Ở bài viết này mình xẽ hướng dẫn các bạn Tạo Slider trình chiếu ảnh với hiệu ứng jQuery đẹp mắt cho Blogger .  Để giúp phần trang chí Blogspot Thêm sinh động hơn

Tạo Slider trình chiếu ảnh với hiệu ứng jQuery đẹp mắt cho Blogger

1. Đăng nhập vào tài khoản Blogger
2. Vào phần Mẫu (Template)
3. Chọn chỉnh sửa HTML (Edit HTML)
4. Chèn code bên dưới vào trước thẻ ]]></b:skin>

 .slider{
width: 640px; /*Same as width of the large image*/
position: relative;        
/*Instead of height we will use padding*/
padding-top: 320px; /*That helps bring the labels down*/
margin: 100px auto;
/*Lets add a shadow*/
box-shadow: 0 10px 20px -5px rgba(0, 0, 0, 0.75);
}
/*Last thing remaining is to add transitions*/
.slider>img{
position: absolute;
left: 0; top: 0;
transition: all 0.5s;
}
.slider input[name='slide_switch'] {
display: none;
}
.slider label {
/*Lets add some spacing for the thumbnails*/
margin: 18px 0 0 18px;
border: 3px solid #999;
float: left;
cursor: pointer;
transition: all 0.5s;
/*Default style = low opacity*/
opacity: 0.6;
}
.slider label img{
&display: block;
}
/*Time to add the click effects*/
.slider input[name='slide_switch']:checked+label {
border-color: #666;
opacity: 1;
}
/*Clicking any thumbnail now should change its opacity(style)*/
/*Time to work on the main images*/
.slider input[name='slide_switch'] ~ img {
opacity: 0;
transform: scale(1.1);
}
/*That hides all main images at a 110% size
On click the images will be displayed at normal size to complete the effect
*/
.slider input[name='slide_switch']:checked+label+img {
opacity: 1;
transform: scale(1);
/*Tạo Slider trình chiếu ảnh với hiệu ứng jQuery đẹp mắt cho Blogger*/

Tiếp tục chèn code sau vào nơi cần hiển thị
 <div class="slider">
<input type="radio" name="slide_switch" id="id1"/>        
<label for="id1">      
<img src="IMAGE LINK" width="100"/>
</label>
<img src="IMAGE LINK"/>
    <!--Tạo Slider trình chiếu ảnh với hiệu ứng jQuery đẹp mắt cho Blogger-->
<input type="radio" name="slide_switch" id="id2" checked="checked"/>
<label for="id2">
<img src="IMAGE LINK" width="100"/>          
</label>        
<img src="IMAGE LINK"/>          
<input type="radio" name="slide_switch" id="id3"/>          
<label for="id3">        
<img src="IMAGE LINK" width="100"/>      
</label>        
<img src="IMAGE LINK"/>        
<input type="radio" name="slide_switch" id="id4"/>          
<label for="id4">          
<img src="IMAGE LINK" width="100"/>        
</label>          
<img src="IMAGE LINK"/>        
<input type="radio" name="slide_switch" id="id5"/>          
<label for="id5">        
<img src="IMAGE LINK" width="100"/>        
</label>      
<img src="IMAGE LINK"/>          
</div>
<script> // StyleFix 1.0.2 + PrefixFree 1.0.6 / Lea Verou / MIT license
(function(){function h(a,b){return[].slice.call((b||document).querySelectorAll(a))}if(window.addEventListener){var e=window.StyleFix={link:function(a){try{if("stylesheet"!==a.rel||a.hasAttribute("data-noprefix"))return}catch(b){return}var c=a.href||a.getAttribute("data-href"),f=c.replace(/[^\/]+$/,""),i=a.parentNode,d=new XMLHttpRequest,g;d.onreadystatechange=function(){4===d.readyState&&g()};g=function(){var b=d.responseText;if(b&&a.parentNode&&(!d.status||400>d.status||600<d.status)){b=e.fix(b,
!0,a);f&&(b=b.replace(/url\(\s*?((?:"|')?)(.+?)\1\s*?\)/gi,function(b,a,c){return!/^([a-z]{3,10}:|\/|#)/i.test(c)?'url("'+f+c+'")':b}),b=b.replace(RegExp("\\b(behavior:\\s*?url\\('?\"?)"+f,"gi"),"$1"));var c=document.createElement("style");c.textContent=b;c.media=a.media;c.disabled=a.disabled;c.setAttribute("data-href",a.getAttribute("href"));i.insertBefore(c,a);i.removeChild(a)}};try{d.open("GET",c),d.send(null)}catch(k){"undefined"!=typeof XDomainRequest&&(d=new XDomainRequest,d.onerror=d.onprogress=
function(){},d.onload=g,d.open("GET",c),d.send(null))}a.setAttribute("data-inprogress","")},styleElement:function(a){var b=a.disabled;a.textContent=e.fix(a.textContent,!0,a);a.disabled=b},styleAttribute:function(a){var b=a.getAttribute("style"),b=e.fix(b,!1,a);a.setAttribute("style",b)},process:function(){h('link[rel="stylesheet"]:not([data-inprogress])').forEach(StyleFix.link);h("style").forEach(StyleFix.styleElement);h("[style]").forEach(StyleFix.styleAttribute)},register:function(a,b){(e.fixers=
e.fixers||[]).splice(void 0===b?e.fixers.length:b,0,a)},fix:function(a,b){for(var c=0;c<e.fixers.length;c++)a=e.fixers[c](a,b)||a;return a},camelCase:function(a){return a.replace(/-([a-z])/g,function(b,a){return a.toUpperCase()}).replace("-","")},deCamelCase:function(a){return a.replace(/[A-Z]/g,function(a){return"-"+a.toLowerCase()})}};(function(){setTimeout(function(){h('link[rel="stylesheet"]').forEach(StyleFix.link)},10);document.addEventListener("DOMContentLoaded",StyleFix.process,!1)})()}})();
(function(h){function e(b,c,f,i,d){b=a[b];b.length&&(b=RegExp(c+"("+b.join("|")+")"+f,"gi"),d=d.replace(b,i));return d}if(window.StyleFix&&window.getComputedStyle){var a=window.PrefixFree={prefixCSS:function(b,c){var f=a.prefix,b=e("functions","(\\s|:|,)","\\s*\\(","$1"+f+"$2(",b),b=e("keywords","(\\s|:)","(\\s|;|\\}|$)","$1"+f+"$2$3",b),b=e("properties","(^|\\{|\\s|;)","\\s*:","$1"+f+"$2:",b);if(a.properties.length)var i=RegExp("\\b("+a.properties.join("|")+")(?!:)","gi"),b=e("valueProperties","\\b",
":(.+?);",function(a){return a.replace(i,f+"$1")},b);c&&(b=e("selectors","","\\b",a.prefixSelector,b),b=e("atrules","@","\\b","@"+f+"$1",b));return b=b.replace(RegExp("-"+f,"g"),"-")},property:function(b){return(a.properties.indexOf(b)?a.prefix:"")+b},value:function(b){b=e("functions","(^|\\s|,)","\\s*\\(","$1"+a.prefix+"$2(",b);return b=e("keywords","(^|\\s)","(\\s|$)","$1"+a.prefix+"$2$3",b)},prefixSelector:function(b){return b.replace(/^:{1,2}/,function(b){return b+a.prefix})},prefixProperty:function(b,
c){var f=a.prefix+b;return c?StyleFix.camelCase(f):f}};(function(){var b={},c=[],f=getComputedStyle(document.documentElement,null),i=document.createElement("div").style,d=function(a){if("-"===a.charAt(0)){c.push(a);var a=a.split("-"),d=a[1];for(b[d]=++b[d]||1;3<a.length;)a.pop(),d=a.join("-"),StyleFix.camelCase(d)in i&&-1===c.indexOf(d)&&c.push(d)}};if(0<f.length)for(var g=0;g<f.length;g++)d(f[g]);else for(var e in f)d(StyleFix.deCamelCase(e));var g=0,j,h;for(h in b)f=b[h],g<f&&(j=h,g=f);a.prefix=
"-"+j+"-";a.Prefix=StyleFix.camelCase(a.prefix);a.properties=[];for(g=0;g<c.length;g++)e=c[g],0===e.indexOf(a.prefix)&&(j=e.slice(a.prefix.length),StyleFix.camelCase(j)in i||a.properties.push(j));"Ms"==a.Prefix&&!("transform"in i)&&!("MsTransform"in i)&&"msTransform"in i&&a.properties.push("transform","transform-origin");a.properties.sort()})();(function(){function b(a,b){e[b]="";e[b]=a;return!!e[b]}var c={"linear-gradient":{property:"backgroundImage",params:"red, teal"},calc:{property:"width",params:"1px + 5%"},
element:{property:"backgroundImage",params:"#foo"},"cross-fade":{property:"backgroundImage",params:"url(a.png), url(b.png), 50%"}};c["repeating-linear-gradient"]=c["repeating-radial-gradient"]=c["radial-gradient"]=c["linear-gradient"];var f={initial:"color","zoom-in":"cursor","zoom-out":"cursor",box:"display",flexbox:"display","inline-flexbox":"display"};a.functions=[];a.keywords=[];var e=document.createElement("div").style,d;for(d in c){var g=c[d],h=g.property,g=d+"("+g.params+")";!b(g,h)&&b(a.prefix+
g,h)&&a.functions.push(d)}for(var j in f)h=f[j],!b(j,h)&&b(a.prefix+j,h)&&a.keywords.push(j)})();(function(){function b(a){e.textContent=a+"{}";return!!e.sheet.cssRules.length}var c={":read-only":null,":read-write":null,":any-link":null,"::selection":null},f={keyframes:"name",viewport:null,document:'regexp(".")'};a.selectors=[];a.atrules=[];var e=h.appendChild(document.createElement("style")),d;for(d in c){var g=d+(c[d]?"("+c[d]+")":"");!b(g)&&b(a.prefixSelector(g))&&a.selectors.push(d)}for(var k in f)g=
k+" "+(f[k]||""),!b("@"+g)&&b("@"+a.prefix+g)&&a.atrules.push(k);h.removeChild(e)})();a.valueProperties=["transition","transition-property"];h.className+=" "+a.prefix;StyleFix.register(a.prefixCSS)}})(document.documentElement);
</script>

Trong Đó IMAGE LINK : Là link ảnh cần hiển thị. Các bạn thay bằng link ảnh cần hiển thị là Oke nhé.
Cuối cùng save lại và xem kết quả.
Chúc các bạn thành công
Nguồn : iChiaSe.Biz

Trang báo lỗi 404 hiển thị khi liên kết bị hỏng hoặc không tồn tại, đây là một tiện ích hỗ trợ SEO cho Website, giảm tỉ lệ thoát Website... Trang báo lỗi 404 có vai trò như công cụ điều hướng cho người truy cập khi họ vô tình vào những link hỏng. Hôm nay iChiaSe Blog's xin giới thiệu đến các bạn tạo trang báo lỗi 404 kèm công cụ search chuyên nghiệp cho Blogspot.

Tạo trang báo lỗi 404 kèm nút Search Google chuyên nghiệp cho Blogspot
Tạo trang báo lỗi 404 kèm nút Search Google cực đẹp cho Blogspot

Các bước thực hiện

Tạo trang báo lỗi 404 kèm nút Search Google cực đẹp cho Blogspot

Bước 1: Các bạn vào Trang quản trị của Blogger→Cài đặt→Tùy chọn tìm kiếm→Tìm đến mục Lỗi và chuyển hướng→Không tìm thấy trang tùy chỉnh→Chỉnh sửa

Tạo trang báo lỗi 404 kèm nút Search Google cực đẹp cho Blogspot
Bước 2: Các bạn tiến hành chèn đoạn code sau: Đây là mẫu 404! của trang Blogger Yard mang tên "Blogger Yard 404 Page"
Mẫu mặc định của Blogger Yard
<!-- Blogger Yard 404 Page share by iChiaSe.Biz-->
  <p style='line-height: 30px'><strong>
<font color='#ff0000' size='5'>
Oh no!
</font> <font color='#666666'>
Rất tiếc! Hình như bạn có nhấp vào một liên kết bị hỏng hoặc một trang không tồn tại. <br/> Vui lòng thực hiện một trong các nội dung sau:
</font></strong></p>
  <ol style='line-height: 25px'>
    <li><a href='javascript:history.go(-1)'>&#171; Trở lại</a> </li>
    <li>Liên hệ báo lỗi với mình<a href='Link trang liên hệ của bạn'> Bấm vào đây</a>&#160;&#160;&#160; (<em>Liên hệ</em>) </li>
    <li>Trở vè trang chủ <a href='Link trang chủ'>Bấm vào đây</a>
      <br/></li>
<li>Bạn có thể sử dụng hộp tìm kiếm thông tin mình cần</li>
  </ol>
<br />
 <center><form _lpchecked='1' action='/search' class='search-form' id='search_mini_form' method='get'>
<input id='searchinput' name='q' onblur='if (this.value == &apos;&apos;) {this.value = &apos;Tìm kiếm&apos;;}' onfocus='if (this.value == &apos;Search the site&apos;) {this.value = &apos;&apos;;}' type='text' value='Tìm kiếm'/>
<input id='searchbutton' style='vertical-align: top;' type='submit' value='Search!'/>
</form></center>
  <p>
    <br/>
    <br/>
    <br/></p>
<p align='center'><font size='5'>Trang không tồn tại!</font></p>
<br /> <br /> <br />
<p align='center'> <font style='font-size:150px; font-weight:bold;' color='#098047'>404</font></p>
<style>
<style>.status-msg-wrap{font-size:100%;margin:none;position:static;width:100%}
.status-msg-border{display:none}
.status-msg-body{padding:none;position:static;text-align:inherit;width:100%;z-index:auto}
.status-msg-wrap a{padding:none;text-decoration:inherit}
#sidebar-wrapper,#midsidebar-wrapper,.gapad2,.blog-pager,.post-header-line-1,.post-footer,#rsidebar-wrapper{display:none !important}
#main-wrapper{width:98%!important}
.post{width:98%!important}
#searchinput{background:#FFF url(http://2.bp.blogspot.com/-PAOe2YSxpxo/VCX4BlzcSSI/AAAAAAAABKU/m76c7h-xyvQ/s1600/search.png) no-repeat 7px 8px;background-color:#FFF;border:1px solid #ddd;color:#A0A0A0;display:inline-block;font-family:arial;font-size:12px;font-weight:bold;height:24px;width:300px;margin:0;margin-top:5px;padding:5px 15px 5px 28px;vertical-align:top}
#searchinput:hover{border:1px solid #bebebe;box-shadow:0 1px 2px rgba(5,95,255,.1);padding:5px 15px 5px 28px}
#searchbutton{background:#444;color:#fff;height:35px;border-radius:5px;box-shadow:1px 2px 1px 1px #ABABAB;border:1px solid #fff;margin-top:3px;padding:8px}
#searchbutton:hover{background:#098047}
</style>
Lưu ý: Các bạn tùy chỉnh mẫu cho phù hợp với Blog của mình nhé!
Mẫu cải tiến công cụ search Google
<!-- 404 Page share by vanvietblog -->
<p style='line-height: 30px'><strong>
<font color='#ff0000' size='5'>
Lỗi 404! Trang không tồn tại!
<br/>
</font> <font color='#666666'>
Rất tiếc! Hình như bạn có nhấp vào một liên kết bị hỏng hoặc một trang không tồn tại. <br/> Vui lòng thực hiện một trong các nội dung sau:
</font></strong></p>
 <ol style='line-height: 25px'>
    <li><a href='javascript:history.go(-1)'>&#171; Trở lại</a> </li>
    <li>Liên hệ báo lỗi với mình <a href='http://www.vanvietblog.blogspot.com/p/lien-he.html'>Bấm vào đây</a>&#160;&#160;&#160; (<em>Liên hệ</em>) </li>
    <li>Về trang chủ <a href='www.vanvietblog.blogspot.com'>Bấm vào đây</a>
      <br/></li>
<li>Bạn có thể sử dụng hộp tìm kiếm thông minh với 2 lựa chọn:</li>
</ol><center>
<form method=get action="http://www.google.com/search" class="googlesearch">
<input type="hidden" name="ie" value="UTF-8"/>
<input type="hidden" name="oe" value="UTF-8"/>
<table align="center">
<td class="bodyText"><input type="hidden" name="domains" value="vanvietblog.blogspot.com"/>
<input type="radio" name="sitesearch" value=""/>Google<input type="radio" name="sitesearch" value=" iChiaSe.Biz" checked /> iChiaSe.Biz<br/>
<input type="text" name="q" size="22" maxlength="255" value=""/>
<input class="button" type="submit" name="btng" value="Tìm kiếm"/></td></table></form></center>
  <p align='center'><font size='4'>Cảm ơn bạn đã ghé thăm Blog!</font></p>
    <p>
<p align='center'><font size='5'>Trang không tồn tại!</font></p>
<br /> <br /> <br />
<p align='center'> <font style='font-size:150px; font-weight:bold;' color='#098047'> Error 404! </font></p>
<br />
<style>
.status-msg-wrap{font-size:100%;margin:none;position:static;width:100%}
.status-msg-border{display:none}
.status-msg-body{padding:none;position:static;text-align:inherit;width:100%;z-index:auto}
.status-msg-wrap a{padding:none;text-decoration:inherit}
#sidebar-wrapper,#midsidebar-wrapper,.gapad2,.blog-pager,.post-header-line-1,.post-footer,#rsidebar-wrapper{display:none !important}
#main-wrapper{width:98%!important}
.post{width:98%!important}
#searchinput{background:#FFF url(https://blogger.googleusercontent.com/img/b/R29vZ2xl/AVvXsEj_lulMtAWqDZjhZnz8WFoGW6hyphenhyphen_fDLzMy-QecM5NuzFGDQiaLyvISlgrVzujtaE4h01H5S2CepkMRobDw3igdmKCnFerVuDEhrU_sGc3wnZkZO-ltoaPGtxN9U4dKynVbKGnsC77HqfS2o/s0/search.png) no-repeat 7px 8px;background-color:#FFF;border:1px solid #ddd;color:#A0A0A0;display:inline-block;font-family:arial;font-size:12px;font-weight:bold;height:24px;width:300px;margin:0;margin-top:5px;padding:5px 15px 5px 28px;vertical-align:top}
#searchinput:hover{border:1px solid #bebebe;box-shadow:0 1px 2px rgba(5,95,255,.1);padding:5px 15px 5px 28px}
#searchbutton{background:#444;color:#fff;height:35px;border-radius:5px;box-shadow:1px 2px 1px 1px #ABABAB;border:1px solid #fff;margin-top:3px;padding:8px}
#searchbutton:hover{background:#555}
</style>
Tùy chỉnh để có được mẫu phù hợp với Blog của mình!
Lưu ý: Khi chèn đoạn code trên, trang báo lỗi 404! Sẽ không hiển thị cột sidebar. Để hiển thị, hãy xóa đoạn code #sidebar-wrapper,#midsidebar-wrapper,.gapad2,.blog-pager,.post-header-line-1,.post-footer,#rsidebar-wrapper{display:none !important} này đi nhé!
Nguồn : Văn Việt Blog's

Script làm dính (Sticky) 1 tiện ích nhất định cho Blogger
Hôm nay iChiaSe Blog's  xẽ giới thiệu với các bạn một đoạn script nhỏ để có thể giúp bạn làm cho 1 tiện ích dính lại trên trình duyệt khi người đọc cuộn chuột xuống dưới để xem nội dung. Sticky là một tiện ích rất hay, nó giúp bạn làm cho 1 tiện ích gồm banner hay 1 nội dung nào đó mà bạn muốn người dùng chú ý nhiều hơn thì có thể cho nó dính cố định khi người độc cuộn chuột xuống dưới web/blog của bạn.

Script làm dính (Sticky) 1 tiện ích nhất định cho Blogger

1. Đăng nhập vào tài khoản Blogger
2. Vào phần Mẫu (Template)
3. Chọn chỉnh sửa HTML (Edit HTML)
4. Chèn code bên dưới vào trước thẻ </body>
<script>
// Sticky widget by www.blogtariff.com
// Tutorial at http://www.blogtariff.com/2013/07/add-sticky-scroll-any-widget-to.html
// Free to use or share, but please keep this notice intact.
//<![CDATA[
ko_makeSticky("HTML1"); // enter your widget ID here
function ko_makeSticky(elem) {
var ko_sticky = document.getElementById(elem);
var scrollee = document.createElement("div");
ko_sticky.parentNode.insertBefore(scrollee, ko_sticky);
var width = ko_sticky.offsetWidth;
var iniClass = ko_sticky.className + ' ko_sticky';
window.addEventListener('scroll', ko_sticking, false);
function ko_sticking() {
var rect = scrollee.getBoundingClientRect();
if (rect.top < 0) {
ko_sticky.className = iniClass + ' ko_sticking';
ko_sticky.style.width = width + "px";
} else {
ko_sticky.className = iniClass;
}
}
}
//]]>
</script>
<style>
.ko_sticking {color:#333;background:#f2f2f2 !important; position:fixed !important; top:0; z-index:9999; box-shadow:0px 10px 4px -5px rgba(0,0,0,0.3); margin-top: 0; position:relative\9 !important;}
</style>

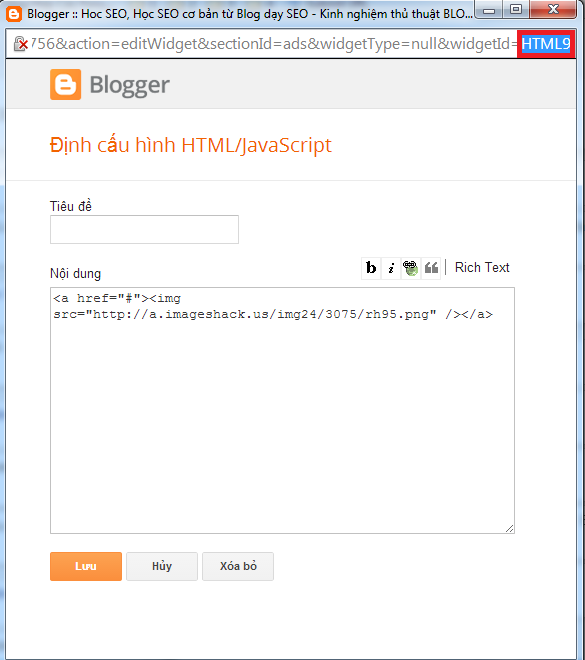
Bạn thay HTML1 thành ID của tiện ích trên blog của bạn mà bạn muốn nó dính lại khi cuộn chuột. Cách xem ID bạn tham khảo hình ảnh bên dưới

Script làm dính (Sticky) 1 tiện ích nhất định cho Blogspot

Chúc bạn thành công!

Nguồn : TraiDatMui Blog's - TDM

Tổng Hợp những website chia sẻ Template đẹp nhất cho BloggerSau đây iChiaSe Blog's Xin giới thiệu với các bạn đang sử dụng Blogger 15 Website chia sẻ template Blogger đẹp nhất.
Ngoài 10 Trang bên dưới còn rất nhiều trang khác ! Nhưng theo sự đánh giá của mình thì đây là 10 Website tổng hợp những Template đẹp. Rất mong bài viết này xẽ giúp các bạn phần nào trong việc tìm kiếm Giao Diện Blogspot

Template Blogger Free

1. Templateify

Ưu: Toàn template đẹp, thiết kế ấn tượng.
Nhược: Phải mua để có đầy đủ CSS cũng như JS để tùy chỉnh trong template.

2. Templateism

Ưu: Lại một trong những nhà cung cấp template vô cùng ấn tượng, được thành lập vào tháng 12 năm 2012.
Nhược: Tạm thời chưa thấy.

3. Djogzs

Ưu: Template phong cách anime đẹp, thumbnail không bị bóp méo.
Nhược: Website bằng tiếng Indonesia, nhiều quảng cáo gây khó chịu.

4. Favorite Blogger Templates

Ưu: Một số template theo dạng báo trí đẹp, miễn phí có thể chỉnh sửa tùy ý.
Nhược: Template của họ ít hơn là template đăng từ website khác.

5. Soratemplates

Giống như Templateify đang dần dần thương mại hóa sản phẩm của họ

6. Btemplates4u

Tổng hợp template từ nhiều nguồn khác nhau bao gồm cả miễn phí lẫn tính phí
.
7. Bloggertheme9

8. Borneotemplates

Nhiều thế kế đẹp nhưng lâu rồi không còn cập nhật nữa.

9. Mastemplate

Một trong những nhà cung cấp được mình yêu thích nhất, nhưng lâu rồi không hiểu sao không còn cập nhật nữa, nhiều template hết hạn sử dụng hoặc link down bị hỏng hết.
10. Btemplates

Nhiều template cổ điển không còn update nữa, rất hữu ích cho những người tìm ý tưởng để thiết kế Blogger Template mới.


11. Template Trackers

Được thành lập tháng 9/2013 và tung ra rất nhiều template đẹp và ấn tượng đặc biệt hoàn toàn miễn phí.


12. SeoBloggerTemplates

Cũng khá nhiều template đẹp và rất ấn tượng, một số template bán nhưng giá rất rẻ.


13. Urang-kura

Web tiếng Indonesia nhiều template đẹp, nhưng khá chói mắt (tùy thẩm mỹ mỗi người thôi).


14. ZoomTemplate

Tổng hợp nhiều template từ các website khác, nhưng lâu rồi không còn cập nhật thường xuyên nữa. Cám ơn anh +Xuân Xanh đã bổ xung.


15. Loefa-cebook

Nhiều template đẹp thường chuyên về những template bán hàng.


Theo mình thấy tất cả các trang khác thì hầu như toàn lấy của nhau thôi, nên mình nghĩ 9 nhà cung cấp template trên là đủ để bạn chọn cho mình một template đẹp. Nếu như bạn muốn template thực sự đẹp và nhiều chức năng, bạn nên bỏ tiền ra mua ở trang nổi tiếng như Themeforest, hoặc thuê những trang web mà mình đã liệt kê ở trên.
Nguồn : iChiaSe.Biz

Code lên đầu trang sử dụng Jquery cho Blogger
Hiệu ứng scroll top ta thường thấy xuất hiện ở 1 số trang web có nội dung dài -khiến người lướt web phải lăn mouse 3 hay dùng trỏ chuột kéo thanh scroll bar rất bất tiện . Và hôm nay mình xin chia sẻ với các bạn Code lên đầu trang sử dụng Jquery cho Blogger
Khi sử dụng hiệu ứng jquery scroll top sẽ giúp người dùng trở về ngay đầu trang - tránh làm mất thời gian - nút bấm scroll top sẽ xuất hiện thi nội dung trang web được

Code lên đầu trang sử dụng Jquery cho Blogger

Các thực hiện như sau:
1- Thêm phần script
<script src='http://ajax.googleapis.com/ajax/libs/jquery/1.7.2/jquery.min.js' type='text/javascript'></script>
<script type="text/javascript">
    $(document).ready(function(){
        $(window).scroll(function(){
            if ($(this).scrollTop() > 100) {
                $('.scrollup').fadeIn();
            } else {
                $('.scrollup').fadeOut();
            }
        });
        $('.scrollup').click(function(){
            $("html, body").animate({ scrollTop: 0 }, 'slow');
            return false;
        });
    });
</script>

2- Thêm phần style của nút lên
<style>
    .scrollup{
    width:40px;
    height:40px;
    opacity:1;
    position:fixed;
    bottom:20px;
    right:10px;
    display:none;
    text-indent:-9999px;
    background:#333333 url('http://icons.iconarchive.com/icons/troyboydesign/delightful-zodiac/128/Snake-icon.png') no-repeat;
}
</style>

Các bạn có thể thay bằng hình ảnh khác cho phù hợp với trang web

http://icons.iconarchive.com/icons/troyboydesign/delightful-zodiac/128/Snake-icon.png

3- Giờ để xuất hiện cái nút đi lên đó bạn hãy đặt trong thẻ body để tiện bạn có thể đặt trước
<a href="#" class="scrollup">Scroll</a>
</body>
Chúc các bạn thành công!
Nguồn : iChiaSe.Biz

Trước đây mình cũng đã giới thiệu với các bạn thủ thuật Tạo khung thông tin tác giả Author Box đẹp cho Blogger. Nhưng nó thực sự chưa tốt và đáp ứng được nhu cầu của những Blogger có nhiều tác giả. Vì nó chưa tự cập nhật tên cũng như ảnh của tác giả bài viết. Và để tiếp tục với thủ thuật tạo Author Box cho Blogger hôm nay mình xẽ hướng dẫn các bạn tạo khung Author Box tự động cập nhật ảnh đại diện và tên cho Blog
Tạo Author box tự động cập nhật thông tin từ tác giả Blogger
Ảnh minh họa

Tạo Author box tự động cập nhật thông tin từ tác giả Blogger

Các bước chèn CSS và code vào template :
Bước 1: Đăng nhập vào blogger.com
Bước 2: Tiếp tục các bạn chọn mẫu >> chỉnh sửa HTML >> Ctrl+F tìm đến thẻ ]]></b:skin> và đoạn  CSS3 bên dưới trước nó
CSS3 author box cho blogspot
/*Author box*/
.author-profile {
line-height: 1.7em;
font-size: 13px;
margin: 6px 0 0;
padding: 0 5px;
background: #000;
border: 2px solid #13BCC4;
color: #fff;
overflow: hidden;
}
.author-profile img {
border: 3px solid #00FA46;;
float: left;
margin-right: 5px;
border-radius: 50px;
width: 80px;
box-shadow: 1px 1px 3px 0 #fff;
padding: 3px;
}
Sau khi chèn CSS xong để hiển thị  Author box cho blogspot các bạn tìm đoạn <div class='post-footer'> thứ 2 nếu không có thì tìm đoạn <b:includable id='post' var='post'>...</b:includable> nếu có đoạn <div class='post-footer'>  thì code bên dưới dưới nó hoặc có thể chèn trong đoạn này <b:includable id='post' var='post'>...</b:includable> tùy theo mỗi template mà bạn đang sử dụng
Code Author box cho blogspot chuẩn HTML5
<b:if cond='data:post.authorAboutMe'>
        <div class='author-profile' itemprop='author' itemscope='itemscope' itemtype='http://schema.org/Person'>
          <b:if cond='data:post.authorPhoto.url'>
            <img alt='Tác giả' expr:src='data:post.authorPhoto.url' itemprop='image'/>
          </b:if>
          <div>
            <a class='g-profile' expr:href='data:post.authorProfileUrl' itemprop='url' rel='author' title='author profile'>
              <b><span itemprop='name'><data:post.author/></span></b>
            </a>
          </div>
          <span itemprop='description'><data:post.authorAboutMe/></span>
        </div>
      </b:if>
Bước 4 Các bạn lưu lại và xem kết quả
Lưu ý: Các bạn chỉnh sửa thông tin và ảnh đại diện của mình bên google plus để được cập nhật nhé vi dụ như của mình .
Author box cho blogspot tự động lấy thông tin từ google plus chuẩn HTML5

Chúc các bạn thành công !

Nguồn : iChiaSe.Biz

Khi lướt web chúng ta thường xuyên gặp các quảng cáo , ads với hình ảnh dọc 2 bên website. Nhưng có nhiều bạn thắc mắc tại sao để làm được như vậy , Và hôm nay iChiaSe Blog's xẽ  chia sẻ đoạn code tạo banner quảng cáo banner chạy dọc 2 bên website( dành cho những bạn sử dụng Blogspot, hoặc không muốn dùng plugin trong WordPress).Đây là đoạn mã được mình áp dụng cho khách hàng của mình, lúc đầu mình cũng sử dụng một plugin trong WordPress đó là Float Left Right Advertising( Xem hưỡng dẫn cài đặt và thiết lập Float Left Right Advertising) nhưng mình nhận thấy Plugin này sử dụng JS nên cũng khá là nặng, m muốn tối ưu độ tải trang hơn nữa, nói chung được cái nào hay cái đó và mình chọn cách sử dụng CSS/ HTML thuần.
Tạo banner quảng cáo chạy dọc 2 bên website bằng HTML
Ảnh minh họa quảng cáo chạy dọc 2 bên website bằng HTML

Tạo banner quảng cáo chạy dọc 2 bên website bằng HTML
Ảnh minh họa

<div id='ads-left'>
<div style='margin:0 0 5px 0; padding:0;width:200px;position:fixed; left:0; top:0;'>
<a href='http://www.ichiase.biz/' target='_blank'><img border='0' height='665' src='http://imgur.com/gIM9she.jpg' width='200'/></a>
</div></div>
<div id='ads-right'>
<div style='margin:0 0 5px 0; padding:0;width:200px;position:fixed; right:0; top:0;'>
<a href='http://www.ichiase.biz/' target='_blank'><img border='0' height='665' src='http://imgur.com/gIM9she.jpg' width='200'/></a>
</div></div>

Trong đoạn code trên id=ads-left là phần hiển thị quảng cáo bên trái website, còn id=ads-right là hiển thị bên phải, bạn chỉ cần chỉnh sửa các giá trị width, right, left, top và link ảnh để phù hợp website của bạn nhé.

Đó là cách đơn giản nhất mình đang sử dụng, điều này làm cho website của bạn nhanh hơn, góp phần tối ưu hóa website của bạn, nhưng đòi hỏi bạn cũng cần phải biết một chút code.

Chúc các bạn thành công!
Nguồn : http://chiase101.com/

Tổng hợp những icon biểu tượnng cảm xúc đẹp trên FACEBOOK

Ký hiệu vui chat trên Facebook mới nhất - Cách tạo viết các biểu tượng icon vào comment facebook. Các icon biểu tượng mặt người trên facbook - Các biểu tượng trên facebook - Tổng hợp các biểu tượng trên Facebook - Ký hiệu vui chat trên Facebook - Tổng hợp các icon trên Facebook - Ký hiệu trên Facebook.Tổng hợp các biểu tượng trên Facebook - Ký hiệu vui Facebook
Biểu tượng cảm xúc mới và đẹp nhất trên FACEBOOK

Chèn thêm icon vào status và comment trên FB để sinh động hơn
Các bạn chỉ cần copy MÃ FACEBOOK (hình vuông) của icon mình yêu thích rồi paste là xong thôi


Nguồn : iChiaSe.Biz

Breaking News là một widget phù hợp cho những trang tin tức, công nghệ, giúp cho người đọc có thể dễ dàng tiếp cận thông tin. Hơn nữa tiện ích này đảm bảo tính khoa học, chuyên nghiệp cho blog.
Mình đã tìm tiện ích này trên mạng, tuy nhiên đa số các tiện ích này đều bị lỗi. Nay chia sẻ đến các bạn tiện ích 2 trong 1 tích hợp Breaking News kết hợp cùng bộ nút mạng xã hội, RSS ẩn hiện trên thanh Breaking News.
Tạo tin tức mới Widget Breaking News kèm Social Buttons cho Blogspot
Ảnh demo
Các bước thực hiện
Bước 1: Các bạn chèn đoạn code sau dưới thẻ mở của header ví dụ: 
<div id='head-top'>
<div id='header-wrapper'>
<b:section class='header-top' id='header-top-section' maxwidgets='1' showaddelement='no'>
Lưu ý:  Đoạn code này phụ thuộc vào template của bạn nhé! Tìm thử (Ctrl+F) các từ khóa như  header-wrapper; header;...
Đoạn code cần chèn:
<b:widget id='PageList1' locked='false' title='Pages' type='PageList'>
<b:includable id='main'>
  <b:if cond='data:title'><h2><data:title/></h2></b:if>
  <div class='widget-content'>
    <b:if cond='data:mobile'>
      <select expr:id='data:widget.instanceId + &quot;_select&quot;'>
        <b:loop values='data:links' var='link'>
          <b:if cond='data:link.isCurrentPage'>
            <option expr:value='data:link.href' selected='selected'><data:link.title/></option>
          <b:else/>
            <option expr:value='data:link.href'><data:link.title/></option>
          </b:if>
        </b:loop>
      </select>
      <span class='pagelist-arrow'>&amp;#9660;</span>
    <b:else/>
      <ul>
        <b:loop values='data:links' var='link'>
          <b:if cond='data:link.isCurrentPage'>
            <li class='selected'><a expr:href='data:link.href'><data:link.title/></a></li>
          <b:else/>
            <li><a expr:href='data:link.href'><data:link.title/></a></li>
          </b:if>
        </b:loop>
      </ul>
    </b:if>
    <b:include name='quickedit'/>
  </div>
</b:includable>
</b:widget>
Bước 2: Chèn giao diện cho Widget
Các bạn tiến hành chèn đoạn sau vào trước thẻ đóng ]]></b:skin>
.PageList h2{display:none}
.PageList ul{background:#F8F8F8;_background-image:none;border-bottom:4px solid #007F74;border-top:4px solid #007F74;margin-top:0;margin-left:-30px;margin-right:-30px}
.PageList ul{margin:0;padding:1;overflow:hidden;list-style:none}
.PageList li a{display:inline-block;padding:.6em 1em;font:normal bold 14px Arial,Tahoma,Helvetica,FreeSans,sans-serif;color:#007F74;border-left:1px solid #fff;border-right:1px solid #ccc}
.PageList li{margin:0;padding:0;float:left}
.PageList li a:hover,.PageList li.selected a{color:#fff;background-color:#007F74;text-decoration:none}
.PageList li.selected a{border-left:0}
Lưu ý: PageList bạn có thể đổi thẻ này bằng 1 thẻ khác như .PageList98 để tránh trùng lặp với các Widget khác.

Giao diện mình đã tối ưu, demo giống như hình ở trên.
Để thêm danh mục cho menu các bạn nhấn vào nút chính sửa nhanh (quickedit) hoặc vào Bố cục để thêm chuyên mục.
Cách thêm chuyên mục như hình bên dưới, chuyên mục là danh sách trang của bạn. Chọn và thêm vào nhé! Sắp xếp chúng bằng việc kéo thả các chuyên mục.


Tạo tin tức mới Widget Breaking News kèm Social Buttons cho Blogspot

Nguồn : Văn Việt Blog's


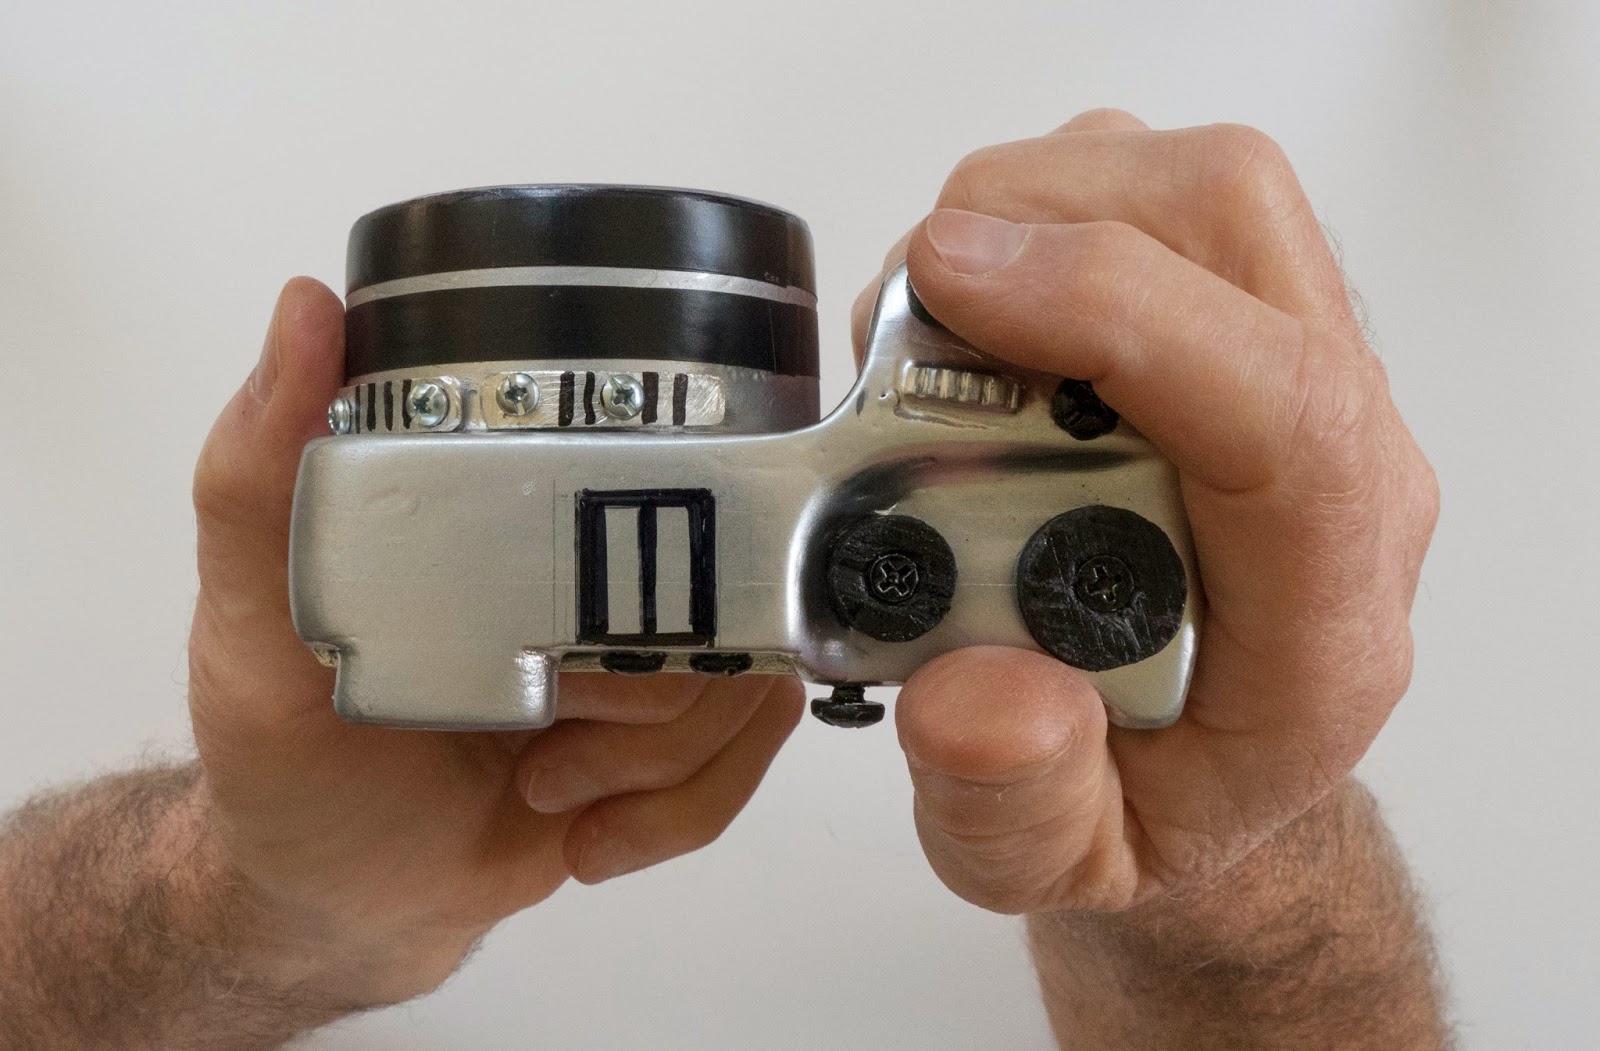
Mockup Ergonomic Alternative to the LX100. This realisation of the concept is very comfortable to hold and would if built be very smooth and fast to operate. The mockup has the same width (115mm) height (66mm) and depth (64mm counting the EVF protrusion) as the actual LX100.
Panasonic's designers   deliberately gave the LX100 a "retro" style control layout with top/rear shutter button location, mini handle,  aperture ring on the lens and shutter speed dial on top of the body.  My time and motion studies have  shown that operating a camera with this arrangement requires more actions and  more complex  actions than are required with a well implemented version of the modern layout using ergonomic handle, mode dial and control dial arrangement. 

As soon as I saw  photographs of the LX100 I realised there is an alternative, more ergonomically efficient way to implement the same concept,  within the same envelope of  dimensions.
LX102  or maybe LX100E ? Whatever the designation this represents my best effort at realising the optimum shape, layout, design and user interface for fast streamlined operation.
When making a mockup I do not start with drawings. I set a few basic size limits within which I will work and I make sure the body thickness is at least equal to a similar actual camera. The shape of the handle and thumb support are created in plywood so the result feels comfortable. It also has to pass the comfort test of several family members with different sized hands.
The buttons and dials are placed where my fingers want to find them, not where I or anybody else imagines they should be located and not where somebody thinks they will look good.
The result has it's own "style" which follows function.  I think the result looks just fine in the "technical" genre which I suspect the LX100 designers wanted to achieve.

Basic Principles  There are four phases of camera use: Setup, Prepare, Capture and Review.

Prepare Phase is the few minutes before making photos. This is the time to make camera settings for the prevailing conditions and the photographic task ahead. 
A very useful type of control module in this phase is the set and see dial, lever, switch or ring. This means a module with marked settings which can be seen by looking at the outside of the camera.
This type of control module is invisible in Capture Phase when one is looking through the viewfinder (or at the monitor but not anywhere else on the camera body)  in the process of taking pictures.  So the main appeal of such modules (that the user can see the settings on picking up the camera) becomes irrelevant when the user is in the process of making photos.
A well implemented camera allows all primary and secondary exposure and focus parameters to be seen and adjusted in Capture Phase while continuously looking through the viewfinder and without having to change grip.

Best use for set and see modules   If  primary exposure parameters such as aperture, shutter speed and ISO  are allocated to set and see modules the setting has to be duplicated in the viewfinder/monitor. But if  settings for these parameters are visible in the viewfinder/monitor they are redundant on set and see modules. The opportunity cost is that  Prepare Phase settings cannot be allocated to those same modules.

Readers unfamiliar with  my ergonomic language might like to click on the Basic Concepts  page at the top of this blog and review the many posts listed there.  

Getting the ergonomics right  The mockup illustrated in this post is my vision of the ideal camera built within the dimensional envelope of the LX100.  It has the same width, height and depth.  But you can see the layout is very different.  The handle makes the mockup appear larger than the LX100 but they share the same width, height and depth.
The lens has been moved across to the left leaving space for  a fully sculpted ergonomic handle on the right. I assume this is technically feasible as several Sony NEX cameras have this relationship between the body, lens and EVF.
On top of the handle is a shutter button, control dial and two buttons with user allocated function.  I would use one for ISO and the other for Exposure Compensation. This arrangement allows for the ergonomically optimal shutter button forward position with the right hand in the half closed/relaxed posture.
Adjustment of aperture/shutter speed (depending on the Mode Dial position), ISO and exposure compensation is very fast, requiring just one finger which has to move no more than 11mm. Both hands hold the camera securely and steadily while these adjustments are made.
The alt button allows the function of a dial or other button to be switched to any user preset alternate function. It is easily reached by the fourth finger of the right hand without disrupting the grip.

The two set and see  dials on top are for Drive Mode and Main Capture Mode.
The largish protruding button just to the left of the thumb is a JOG lever for direct control of AF box position.
Including the 4 way controller on the camera back there  is a total of 10 buttons, each with user allocated function.
The monitor is  fully articulated, which experience has taught me is the most versatile type.  
The set and see modules on top of the body and lens barrel are used for Prepare Phase actions, not squandered on Capture Phase adjustments.
Aperture is adjusted with the Control Dial. The rings on the lens are for manual focus and zoom.

All the buttons are larger,  more prominent and more tactile (well they are Phillips head screws which actually serve well as buttons because they are easy to locate by feel)  than those usually found on a small camera. But they are located so that none will be accidentally pressed while using the camera.

In due course I will fully test a real LX100 and will run time and motion studies comparing the LX100 with the Mockup "LX102".

Update February 2015 

Well, I did buy the LX100 and have used it extensively. At least I did until it suddenly stopped working a month ago. It is still in the repair facility waiting for a new motherboard or some such.

The LX100 user experience has been much as I predicted. Holding and operating could be much improved with a modern handle and control layout. 
Looking at you, ergonomically

Tạo khung like Facebook, Google +1 bên trái với hiệu ứng đẹp mắt cho BloggerHôm nay mình xẽ tiếp tục hướng dẫn các bạn Tạo khung like Facebook, Google +1 bên trái với hiệu ứng đẹp mắt cho Blogger. nó xẽ hiển thị ở bên phải website nhé! Với tiện ích này các bạn xẽ trang trí được website thêm sinh động hơn và giúp người dùng dễ dàng tìm thấy FB, Google , ... của website


1. Đăng nhập Blogger
2. Mẫu > Chỉnh sửa HTML
3. Tìm thẻ ]]> </ b: skin>
4. Dán code dưới vào trên thẻ vừa tìm được ở bước 3.
.social-buttons {
    position: fixed;
    top: 130px;
    width: 45px;
    z-index: 9999;
}
.button-left {
    left: 0;
}
.button-right {
    right: 0;
}
.social-buttons #twitter-btn .social-icon,
.social-buttons #facebook-btn .social-icon,
.social-buttons #google-btn .social-icon,
.social-buttons #rss-btn .social-icon,
.social-buttons #pinterest-btn .social-icon,
.social-buttons #youtube-btn .social-icon {
    background-color: #33353B;
    background-image: url(https://blogger.googleusercontent.com/img/b/R29vZ2xl/AVvXsEjpunElu2Tl3_1rdZngmAp2FBk89o3uDGfWQPF5U0-VaI2hG6w6I5-_Z8uXNcrCDFYgurKV0jldSppGeN_qKNIBdwHCma2DsTwzR6iCumTVzu-W0QMxWqJ-aqb9GDS-Ta6bDMtkYLnUCnM/s1600/mas-icons.png);
}
.button-left #facebook-btn span {
    background-position: right 10px;
}
.button-left #twitter-btn span {
    background-position: right -35px;
}
.button-left #google-btn span {
    background-position: right -127px;
}
.button-left #rss-btn span {
    background-position: right -80px;
}
.button-left #pinterest-btn span {
    background-position: 11px -177px;
}
.button-left #youtube-btn span {
    background-position: 11px -223px;
}
.button-right #facebook-btn span {
    background-position: 12px 10px;
}
.button-right #twitter-btn span {
    background-position: 11px -35px;
}
.button-right #google-btn span {
    background-position: 10px -127px;
}
.button-right #rss-btn span {
    background-position: 11px -80px;
}
.button-right #pinterest-btn span {
    background-position: 11px -177px;
}
.button-right #youtube-btn span {
    background-position: 11px -223px;
}
.social-buttons #facebook-btn:hover .social-icon {
    background-color: #3B5998;
}
.social-buttons #twitter-btn:hover .social-icon {
    background-color: #62BDB2;
}
.social-buttons #google-btn:hover .social-icon {
    background-color: #DB4A39;
}
.social-buttons #rss-btn:hover .social-icon {
    background-color: #FF8B0F;
}
.social-buttons #pinterest-btn:hover .social-icon {
    background-color: #D43638;
}
.social-buttons #youtube-btn:hover .social-icon {
    background-color: #C4302B;
}
.social-buttons a:hover .social-text {
    display: block;
}
.button-left .social-icon {
    -moz-transition: background-color 0.4s ease-in 0s;
    -webkit-transition: background-color 0.4s ease-in 0s;
    background-repeat: no-repeat;
    display: block;
    float: left;
    height: 43px;
    margin-bottom: 2px;
    width: 43px;
}
.button-left .social-text {
    display: none;
    float: right;
    font-size: 1em;
    font-weight: bold;
    margin: 11px 40px 11px 0px;
    white-space: nowrap;
}
.button-right .social-icon {
    -moz-transition: background-color 0.4s ease-in 0s;
    -webkit-transition: background-color 0.4s ease-in 0s;
    background-repeat: no-repeat;
    display: block;
    float: right;
    height: 43px;
    margin-bottom: 2px;
    width: 43px;
}
.button-right .social-text {
    display: none;
    float: left;
    font-size: 80%;
    font-weight: bold;
    margin: 11px 0 11px 40px;
    white-space: nowrap;
}
.social-buttons .social-text {
    color: #FFFFFF;
}

Tiếp theo chèn code sau trước thẻ </head>
<script src='http://ajax.googleapis.com/ajax/libs/jquery/1.8.3/jquery.min.js' type='text/javascript'/>
<script src='http://ajax.googleapis.com/ajax/libs/jqueryui/1.9.2/jquery-ui.min.js' type='text/javascript'/>
<script>
    $(window).load(function(){
        $(&#39;.social-buttons .social-icon&#39;).mouseenter(function(){
            $(this).stop();
            $(this).animate({width:&#39;160&#39;}, 500, &#39;easeOutBounce&#39;,function(){});
        });
        $(&#39;.social-buttons .social-icon&#39;).mouseleave(function(){
            $(this).stop();
            $(this).animate({width:&#39;43&#39;}, 500, &#39;easeOutBounce&#39;,function(){});
        });
    });
</script>
Cuối cùng chèn code sau trước thẻ </body>
<div class='social-buttons button-right hidden-phone hidden-tablet'>
<a class='itemsocial' href='https://www.facebook.com/your FB' id='facebook-btn' target='_blank'><span class='social-icon'><span class='social-text'>Follow via Facebook</span></span></a>
<a class='itemsocial' href='https://twitter.com/your twitter' id='twitter-btn' target='_blank'><span class='social-icon'><span class='social-text'>Follow via Twitter</span></span></a>
<a class='itemsocial' href='https://plus.google.com/your G+' id='google-btn' target='_blank'><span class='social-icon'><span class='social-text'>Follow via Google</span></span></a>
<a class='itemsocial' href='http://pinterest.com/your ID' id='pinterest-btn' target='_blank'><span class='social-icon'>
<span class='social-text'>Follow via Pinterest</span></span></a>
<a class='itemsocial' href='https://www.youtube.com/user/your ID' id='youtube-btn' target='_blank'><span class='social-icon'><span class='social-text'>Follow via Youtube</span></span></a>
<a class='itemsocial' href='http://feeds.feedburner.com/your feed' id='rss-btn' target='_blank'><span class='social-icon'><span class='social-text'>Follow via RSS</span></span></a>
</div>
Save lại và xem kết quả nào ?
Các bạn thay Your id thành ID của các bạn nhé!
Chúc các bạn thành công
Nguồn : iChiaSe.Biz

Biểu mẫu liên hệ

Tên

Email *

Thông báo *

Được tạo bởi Blogger.